This is part 2 of my review of Scrivener. You can read Part 1 here.
As promised, here’s the beginning of my comparison between Scrivener and Microsoft Word. This post will focus exclusively on organization during the writing process.
The thing about Microsoft Word that is frustrating when you’re working on a long work is that regardless of whether you use the view that shows pages or the web view, Microsoft Word is always one long document that you have to scroll through to get to wherever you need to be. Navigating through it can be a slow process, especially if you’re just trying to find that one page where you mentioned what color you made the main character’s best friend’s sister’s hair. Where the heck did you mention that tiny detail?
Don’t get me wrong: Microsoft Word is great. It’s so much faster and neater to type things out than to write them by hand. The program’s formatting abilities and other features such as track changes and footnotes have been wonderful for me when it came to getting various assignments done in college. Now that I’ve used Scrivener for a little while though, I’ve realized there are some features that MS Word is seriously lacking which simplify the writing process.
Before I started to write on Scrivener, I usually found myself creating many Word documents for a single project in order to keep track of the various materials I was using. I’d have a folder for my project, and in it a document for my manuscript, then a separate one for research, and another for supplemental materials like character sketches. For a really big project like a research paper I might have eight or nine different files, including PDFs of articles for research. I’d also have to go back and forth between each of them and my manuscript throughout the writing process, which takes you out of what you’re doing and can lead to distractions, like watching YouTube videos…
 As I explained in my last post, when one opens a project in Scrivener, the program creates a Binder for it. The Scrivener binder does exactly what you’d expect a good binder to do in the physical world: it keeps all your files for a particular project in one place. That means character sketches, location descriptions, your outline, and even your research are all contained in that binder.
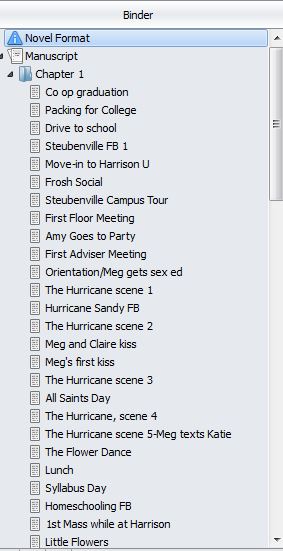
I already showed an image of the binder for the tutorial, but here I’ve included screenshots of the binder for my actual novel. It’s huge (too big for one screenshot). As you can see if you look to the left, I have chosen to take advantage of Scrivener’s ability to keep each scene separate. Those small text documents on the left are my scenes. They’re in the chapter 1 folder because I haven’t figured out how I want to break them up yet, but after revision, there will likely be several scenes per folder. Above that chapter 1 folder and flushed to the far left, you can see it says “Manuscript” with a different icon from the lower text documents. Clicking on this allows you to see the full manuscript as one document (the way Microsoft Word is 100% of the time). I mostly used this feature to check my word count during NaNoWriMo. Ultimately, looking at the smaller segments of the story was more helpful to me. It allowed me to focus entirely on the moments I was creating, and having scene names up there also helped me quickly look back to see what had already happened without having to skim segments or scroll through the whole document. It speeds up navigation too. If I want to reread the scene labeled “drive to school” when I’m in the middle of writing “syllabus day,” I don’t have to scroll all the way through the document looking for the right scene. I can just click on it in the binder, and I’m there. Like flipping open to the correct tab in a physical binder.
The feature on the binder that I used the most (besides the manuscript itself) is without a doubt the Characters section. If you take a look at the long photo below this paragraph, you’ll see my character list. It’s huge. My main character is transitioning from high school to college, so there are two separate casts of characters: the ones she’s just meeting, and the ones she’s leaving behind back at home.
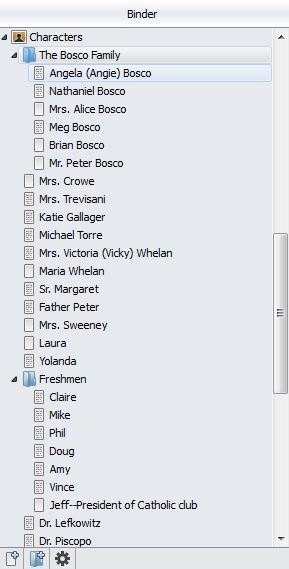 You’ll notice some characters’ names are flushed to the left, while others are slightly indented. It turns out that one can organize characters into folders just like one can organize scenes into them. I’ve been arranging my characters by family (for the people Meg knows from home) and by graduating class (for the people Meg meets at school).
When you click on each character’s name, it has a small text document to go with it as well, which functions similarly to the manuscript text documents. Scrivener even provides a template for simple character sketches which is not bad at all. I started out doing brief character sketches, at least for the major characters, using the Scrivener template, but when I got to the minor characters I started just copying and pasting my initial descriptions of them into their text documents, just as a way of keeping track of what they look like and who they are. It proved immensely helpful as I wrote because this meant that I didn’t have to sift through an entire scene or scenes to find the place where I first described a character. I could just click on the character’s text document and see what I had written. That was a major time saver for me.
Then, just like the character section, there’s the Research section, and a Places section. I didn’t find myself using the Research section much for this project because this story takes place in the present day. However, I have a long project I started in college that was a historical fiction novel, and I’m looking forward to working on that one again using Scrivener. Much like the Characters section, the Research and Places sections allow you to keep track of those aspects of your story within the same binder. I found myself doing the same thing for places that I was doing for minor characters: copying and pasting my descriptions into the accompanying text documents. This made later scenes easier to describe.
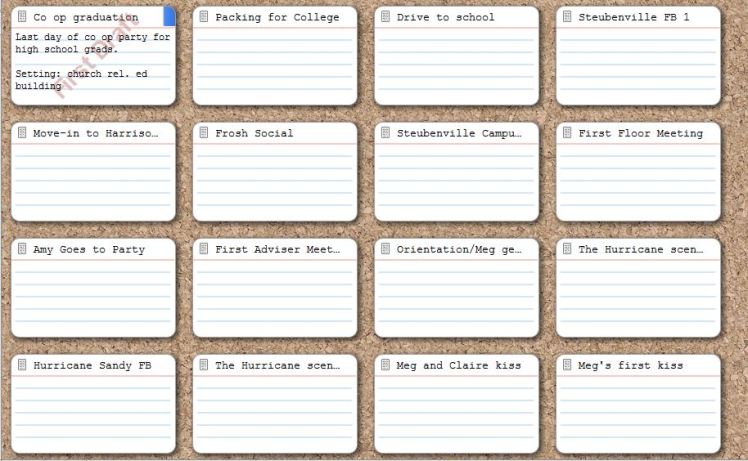
Scrivener has tons of organizational features I didn’t even utilize. I’ll only touch on them briefly because this post is getting really long. There’s the Corkboard view (pictured below), which I think is pretty self explanatory. It lets you rearrange your scenes (just click and drag) and keep track of them in a more visual way than the binder, which may be great for those of you who like to use index cards for this. I’ve just never been one of those people. Each index card has room for a brief description or whatever you want to write to help you remember what happens in each section or scene. You’ll see I only have a description for the first scene. I did that to give the feature a try, then stopped when I realized I just didn’t need this feature personally.
There’s also a feature that allows you to tag themes and keywords. Maybe when I get to like draft 4, that’ll come in handy. Right now, I’m just trying to get the basic plot and the characters to work.
Overall, I’m extremely happy about the way Scrivener is organized. Based on these features alone, I think it’s easy to see why I’ve switched away from Microsoft Word for my longer writing projects. There’s just so much more that Scrivener allows you to do beyond the basic word processing tasks that Microsoft Word does so well.
But maybe your writing process is different. I’m curious to hear what other people think, especially if you’ve tried Scrivener for a long writing project. Did it help you stay organized? Or were there just too many features to keep track of? Let me know in the comments!

I like your review style, edefreitas. Very authentic :). Would love to feature your reviews in our weekly curated email digest that goes out to thousands of people.
LikeLike
Hi Elissa, I’m flattered. I’ll have to learn more about it first but thanks for your comment. I appreciate you checking out my posts. 🙂
LikeLiked by 1 person
Sure thing! If you let me know your email we’ll send the details. Thanks 🙂
LikeLike
Sure. You can send them to 1yearwonder@gmail.com . Thanks!
LikeLiked by 1 person
Thanks :). Someone should be reaching out to you shortly if they haven’t already. Let me know!
LikeLike
Well done, again, edefreitas!
LikeLiked by 1 person
Thank you, Mark!
LikeLike